Today I'm bringing back the "New Product Tuesday" series on my blog. I will try my best to post more "new product" Tuesday projects and even some videos! I'm shooting (no pun intended) for one video each month. It might be a New Product video, or it might be something random... like a shopping haul.
For those who are new, I'm defining a "new product" as something new to my personal scrapbook and card making collection. The product may have been in the marketplace for months, even years, but it's new to my stash and this forces me to use it!
Today's project is both NEW (i.e. released in February 2016) and it includes a video! I am featuring the brand new February 2016 Simon Says Stamp card kit. Unfortunately, it looks like this kit is currently out of stock on their website. However, if you subscribe to the kits, you can get a new box sent to you each month. Major Happy Mail! Note: I do not work for, nor am I affiliated with, Simon Says Stamp. I just LOVE their products! Yup, big fan here.
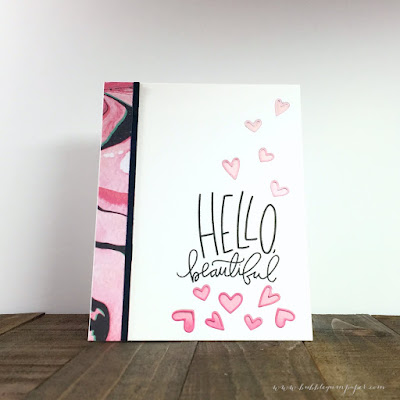
Here is the card I made:
Here is the video that showcases both the kit and step-by-step instructions on how I made the card. If the video doesn't play below, you can watch it on YouTube here.
Materials used:
- White card base: 4.25"W x 11"H, scored at 5.5" mark
- White card for front panel: 4.25"W x 5.5"H
- Simon Says Stamp February 2016 Card Kit
- Versafine Onyx Black Ink
- Adhesive Tape Runner and Glue Pen
Directions:
- Watch the video! Okay okay, here are the printed directions too...
- Stamp the "Hello Beautiful" sentiment on the lower right corner of the front panel
- Die cut hearts above and below in a cascading pattern.
- Die cut a ton of hearts from the ombre patterned paper that comes in the kit. Keep the outlines.
- Cut a strip of the ombre paper (3"W)
- Cut a strip of the pink and black marble paper (0.75"W)
- Cut a strip of the black cardstock (0.125"W)
- Place the ombre paper behind the hearts
- Place the marble and black strips on the left side of the card.
- Glue the outline hearts into each die cut hole... yes, watch the video.
- Attach the card front to the card base. You're done.


No comments:
Post a Comment
Look forward to your feedback and any fun ideas I should incorporate into my card designs. Or just say hello!