Showing posts with label copic. Show all posts

Tuesday, July 14, 2015

"New" Product Tuesday: Time for Ice Cream featuring Lawn Fawn stamps

Happy Tuesday!

Today was the perfect day for ICE CREAM.  It was 90 degrees and super hot and sunny.  I recently purchased the Lawn Fawn "Here's the Scoop" stamp and die set along with the Owen's ABCs stamps.  They were perfect for my ice cream craving today -- and no calories!  Who knew that stamping would be the best cure for sweet cravings?


I am also entering this card into the CAS(E) this Sketch Challenge #131.  Below is the sketch that inspired this card layout.  I want to scatter hearts around the card because that's how much I LOVE ice cream.  I used glossy accents to help them stand out.

CAS(E) this Sketch #131

Materials:
  • White card base: 4.25"W x 11"H, scored at 5.5" mark
  • Peach patterned paper: 4.25"W x 5.5"H
  • White card stock for the mat and the ice cream pieces
  • Lawn Fawn Here's the Scoop stamp and die set
  • Lawn Fawn Owen's ABCs stamp and die set
  • Avery Elle Finished Frames die set
  • Hero Arts Shadow Inks: Fresh Peach, Mint Julep and Butter Bar
  • Memento Tuxedo Black Ink
  • Ranger Glossy Accents
  • ZIG Wink of Stella Pen
  • Copic Markers for the cone: E50, E53, E55
Directions:
  • Stamp the ice cream scoop outline in black ink.  Stamp the ice cream scoop filling into each outline form using each of the three stamp colors. Die cut with coordinating dies and add Wink of Stella for some shimmer.
  • Stamp the ice cream cone onto some copic friendly paper.  Color with copic markers
  • Stamp the Y, U, M circles using the three stamp colors.  Die cut with coordinating dies
  • Die cut the white mat using the larger frame from the Avery Elle finished frames set.
  • Adhere the ice cream scoops and YUM circles using foam adhesive.
  • Stamp hearts in alternating colors around the sentiment and cone.  Finish with Glossy Accents and allow to dry.
  • Assemble all the layers.  YUM!
Here's a close-up of the card so you can see the detail:


Now, who's in the mood for ice cream???

Tuesday, December 16, 2014

Countdown to Xmas: 25 Cards, 25 Days - Day 16

Greetings!

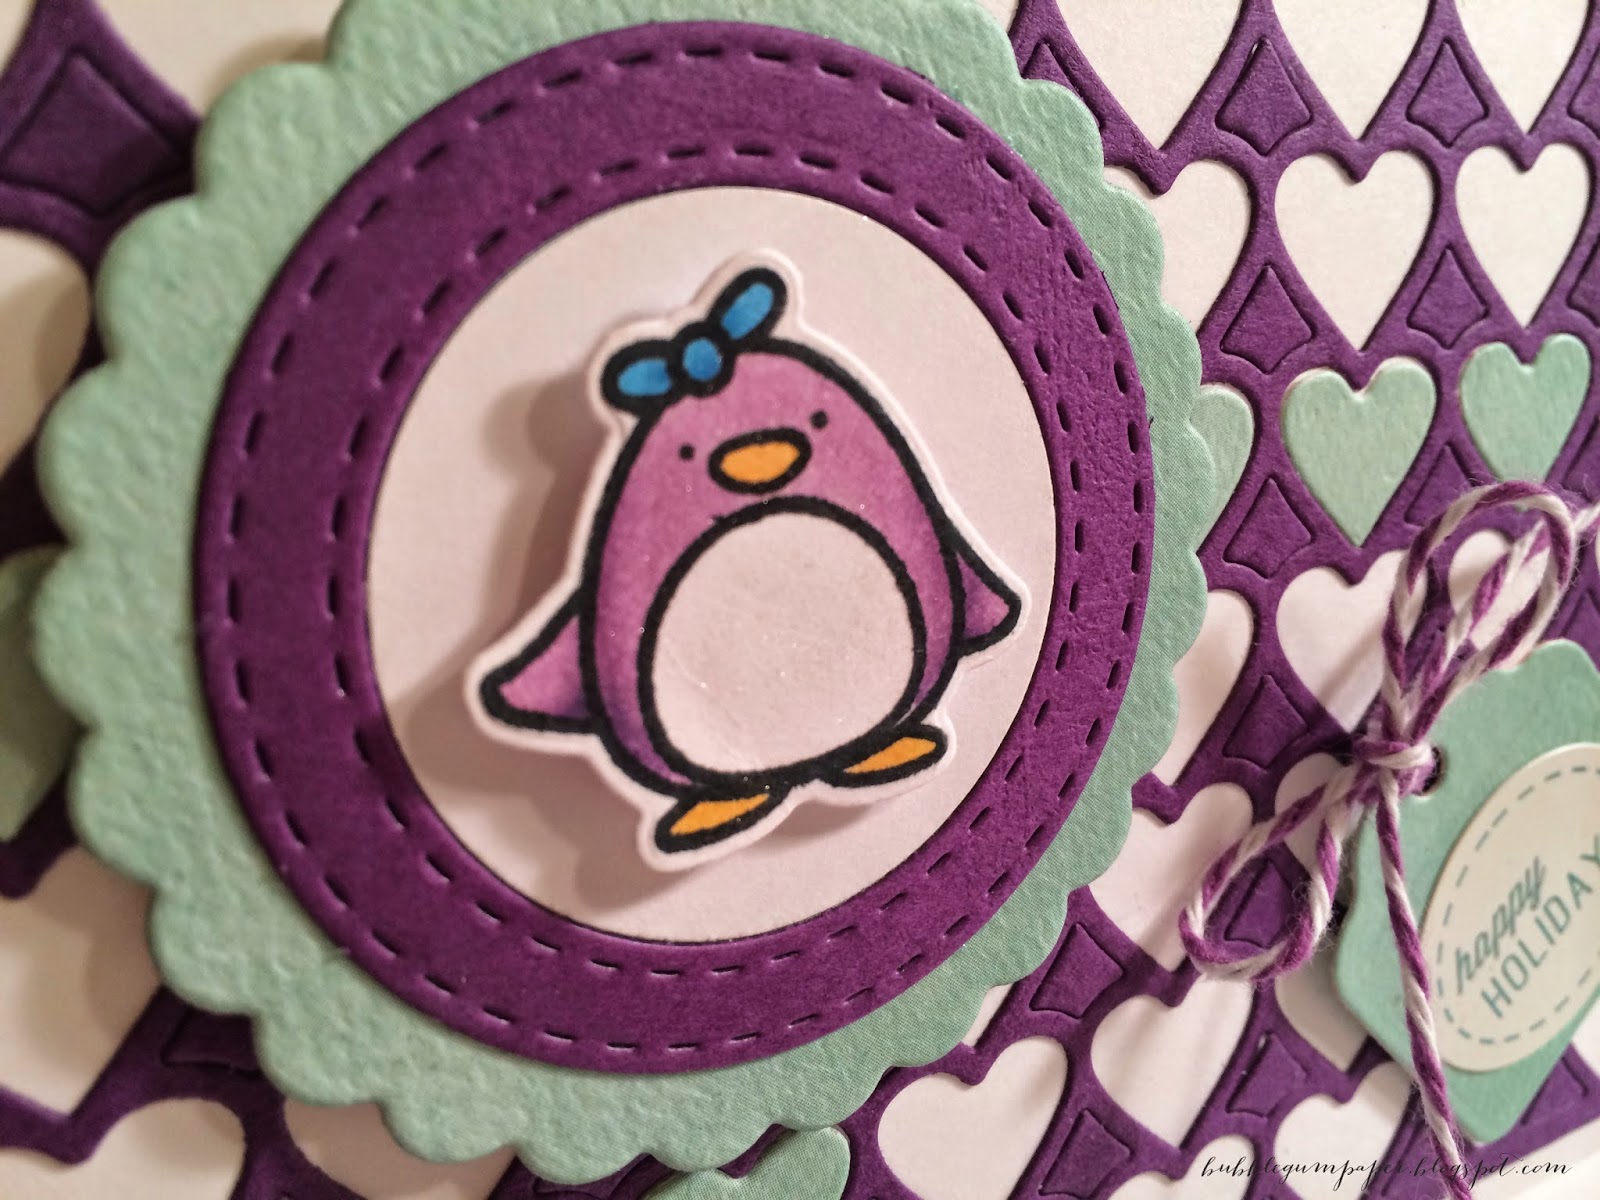
I decided to stray from the traditional red/green color combination and made a purple/aqua card.  It's a generic "happy holidays" card using the Taylored Expressions hearts cutting plate along with some product you've seen in previous cards.  The cute Polar Pals Penguin from Mama Elephant makes her appearance again in today's card.


Materials:

 Directions:

  • Stamp the Penguin on white card stock with Memento Tuxedo Black ink and color with Copic markers
  • Cut a scalloped circle from the Aqua Paper, Stitched Circle from the purple paper and plain circle from the white card stock.  Glue all three layers together and put the penguin on top with foam adhesive.
  • Adhere one Sizzix Adhesive Sheet to the back of the purple card stock (at least 4.25" x 5.5").  Also add some waxed paper between the heart cutting plate and the card stock.  This will prevent the paper from getting stuck in the cutting plate.
  • Repeat the previous step with Aqua paper.  You only need to die-cut half the heart cutting plate since you only need 14 aqua hearts.
  • Place the purple heart pattern on the white card base, remove the hearts, but keep the little pieces between the hearts in place.  Create a "ribbon" - vertical and horizontal lines using the aqua hearts.  
  • Adhere the Penguin piece over the intersection of the aqua hearts.
  • Die cut the tag and add the twine and sticker.  Adhere to lower right corner with a foam dot.
  • Here's a close-up of all the die-cutting for this card:


Enjoy!

Friday, December 12, 2014

Countdown to Xmas: 25 Cards, 25 Days - Day 12

Hi everyone,

Last month, I was flipping through some magazines - Martha Stewart Living, Real Simple, Stationery Trends, the Paper Source catalog (yes, I consider that a magazine)... and I saw some paper rosettes.  I said to myself, "I want to make some rosettes!"  I'm sure you all say that every now and then.  So, I gathered my supplies, started my new craft project, got sidetracked and never finished them.  Fast-forward a week later and a good friend of mine came over for a craft night.  We finished making rosettes that night.  She used them for a bridal shower while I still didn't know what to do with mine.  I gave a few to friends' kids during Thanksgiving weekend, but I still had a pile sitting on my desk.  So, that's my long way of saying... I made a card with one of those mini rosettes today!  I used Carta Bella Merry and Bright (surprise, surprise) patterned paper for the rosettes.  Carta Bella makes really study, heavier, textured patterned paper.  I love their designs too.


And, in case this looks familiar, I also used a few Christmas trees similar (practically identical) to the ones in the Day 4 Gingerbread House card.

Materials:


Directions:

  • Make a mini paper rosette.  Score the 12"W x 1"H paper at the 0.25" mark.  Fold in accordion style as if you were folding a fan.  Cut off one of the ends (0.25"W).  Glue to the two ends together so it forms a circle.  Squish the circle down to form the rosette.  Apply hot glue to the center (don't burn your hands) and hold in place for a few minutes until the glue cools).  
  • Eventually I'll make a video or post how this is done. 
  • Stamp the Christmas tree on white card stock with Memento Tuxedo Black ink.  Color with Copic Markers.  Add white accents on the tree and cover with Wink of Stella Glitter.  Cut this out from the coordinating die cut.  Make two trees.
  • String twine across the back of the rosette and glue in place.
  • Cut two stitched circles and place them in the center of each side of the rosette.  Add the trees to the center using foam adhesive.
  • Temporarily adhere the red card front to the white card base.  Place the scalloped circle die in the center of the card and die cut through both pieces of paper.  Remove the red front and set aside.
  • Use strong adhesive (like Scor-Tape) to adhere the twine and roses to the white card base.  See image below:

This is what's hiding under the red card stock front panel
  • Place adhesive on the back of the red card stock.  Glue the red card stock to the front of the white base; be sure to line-up the scalloped circle.
  • And... there you have it!  A spinning tree card.
Have a Spintastic day!