Showing posts with label taylored expressions. Show all posts

Saturday, May 14, 2016

A Whale-y Fun Card featuring Lawn Fawn and Echo Park Paper Co.

Hi everyone!

Happy Saturday!  Hope your weekend is off to a great start.  My card today is for my good friend's six year old son who loves whales!  They came to visit Southern California and had a "whale-y" fun time whale watching.  He also happens to be my youngest YouTube viewer, so the video I posted on my YouTube channel incorporates his feedback.  I used the "Whale You Be Mine" stamp set from Lawn Fawn and paired it with some fun Echo Park Paper Co. patterned paper.


Materials:
  • Lawn Fawn: Whale You Be Mine stamps and coordinating dies
  • Lawn Fawn: Scripty Sayings
  • Echo Park Paper Co: Pirate's Life, Creative Agenda, Dots & Stripes paper
  • Simon Says Stamp: Stitched Rectangles, Stitched Shapes, Stitched Circles
  • Taylored Expressions: Rolling Clouds
  • Quicklets Eyelets in Red
  • Rope
  • Memento Tuxedo Black Ink
  • Copic Markers: W00, W2, W4, R20, R22, R24, BG10
  • Distress Inks: Mermaid Lagoon, Salty Ocean
  • Foam Adhesive, Adhesive Tape Runner, Glue Pen

Directions - Video Tutorial:

  • Please watch my YouTube video (click here) for a full start-to-finish "how-to" video of this card. You can also click the image below.
Click here to watch me make this card on YouTube

Directions - Quick Highlights:
  • Stamp the images on copic-friendly card stock, color with Copic markers and die cut with coordinating dies
  • Die cut a stitched rectangle from the blue stripe and woodgrain patterned paper and white card stock.  Use the stitched edge to cut a diagonal.  Line it up with the blue diagonal to get a perfect cut.
  • Die cut a porthole window frame using the two largest stitched circles from four pieces of white card stock and the red polka dot paper.
  • Die cut a circle for the background of the porthole window
  • Using Distress Inks, ink up a scrap piece of card stock for the ocean and die cut using the circle and rolling cloud dies.
  • Assemble the window.
  • Punch six holes across the top of the woodgrain paper.  Insert the quicklets into each hole and set it with a ballpoint pen.  String some rope through the holes and finish the edges with knots.
  • Glue all the pieces to the card insert.  Then use foam adhesive to prop it up on the card base.
  • Stamp the sentiment in the inside of the card.
Here's a close-up of the card.


Have a whale-y great weekend!


Tuesday, May 10, 2016

A Birthday Shaker Card | Happy Birthday, Teresa!

Greetings everyone,

Today I'm sharing a fun birthday shaker card that I made for my college roommate, Teresa. Before I left for college, my brother told me one of his friends had a little sister who was starting at MIT too and maybe we'd meet.  I remember thinking "sure -- the school is so big, it's doubtful I'll randomly bump into this person."

Fast forward to Day 1.  Back then, MIT randomly assigned you to temp housing.  You stay in these temp dorm rooms for a week or so before "matching" with your preferred dorm or sorority/fraternity. My temp room was right next door to Teresa's, but at the time I had no idea she was my brother's friend's little sister. We met and went through orientation week together. One day, while sitting in Killian Court, the large spacious lawn in front of MIT's Great Dome, we were eating free popsicles with cheesy jokes on them (it was super hot and humid).  We started to share more about our backgrounds.  I mentioned I had an older brother who just graduated from Harvard.  And she said, "Oh, my sister is a senior at Harvard..." and then we paused, looked at each other and suddenly the light bulbs went off in our heads. We simultaneously screamed "Oh! You're the one my [brother | sister] mentioned!"

Years later, we separately found our way to Los Angeles and reconnected.  Now I have a great friend and crafting buddy close by!  Teresa is sooo supportive of Bubblegum Paper.  In fact, she was my very first YouTube subscriber!  Happy Birthday, Teresa.  This card is for you:

Materials:
  • Simon Says Stamp: Happy Birthday Circle die
  • Simon Says Stamp: Hello, Beautiful stamps
  • Simon Says Stamp: Stitched Rectangles
  • Simon Says Stamp: Stitched Circles
  • Lawn Fawn: Home Sweet Home stamps and dies
  • Lawn Fawn: Chit Chat stamps and dies
  • Lawn Fawn: Perfectly Plaid paper
  • White card base: 4.25"W x 11"H, scored at 5.5" mark
  • White card stock
  • Aqua card stock
  • Clear acetate sheet
  • Memento Tuxedo Black Ink
  • Copic Markers
  • Sizzix Adhesive Sheet
  • Taylored Expressions: Metal Shim
  • Taylored Expressions: Rainbow Brights sequins
  • Wink of Stella Glitter Pen
  • Foam Adhesive
  • Adhesive Tape Runner

Directions via YouTube:

  • Click here to watch me make the card on YouTube:

Click the image above to watch the video on YouTube
Directions - Step by Step:
  • Stamps the birds, banner and sentiment on copic-friendly card stock.  I'm using Neenah Classic Crest Solar White 110lb card stock. Color with copic markers.
  • Die cut a window from some white card stock using the stitched rectangle and stitched circle dies.
  • Die cut the Happy Birthday Circle from both white and aqua card stock.  To make it easier to glue this on the acetate sheet, apply a Sizzix adhesive sheet to the back of the card stock before die cutting.  It's a great way to get instant stickers!
  • Glue the acetate to the back of the window.  Add foam adhesive around the window and the edges of the back of the front panel.  Fill with sequins.
  • Attached the perfectly plaid paper to the card base and carefully adhere the card base to the front panel. Be careful not to spill the sequins!
  • Attach the Happy Birthday die cuts to the front window.  I layered a white one on top of the aqua one.
  • Add the banners and birds as the finishing touch!
Happy Birthday, Teresa!


Saturday, May 7, 2016

A Washi Tape Birthday Card | Happy National Scrapbook Day

Hi everyone,

Today is my friend Jen's birthday... I call her Chu.  Chu and I met when I was 8 years old. We grew up in a small town in New England.  A few of my friends refer to it as a real-life "Stars Hollow" (a la Gilmore Girls). Now, decades later, we both live in Los Angeles.

Chu is a major pet lover.  She's always had pets for as long as I can remember.  It started with a cat here or there and then a few years ago she added a little puppy to her menagerie. I, on the other hand, am petrified of any furry animals.  Well, animals or any non-human/non-plant living things. However, I am not afraid of cartoon animals (Garfield, My Little Pony, Mickey Mouse) or plush stuffed animals (Mickey, Snoopy) or cute stamp sets!  So... my card today features a little puppy and some happy cute products from Doodlebug Design.


Today is also National Scrapbook Day!  There are so many fun events and challenges happening in honor of National Scrapbook Day.  I entered this card into the Scrapbook.com / Doodlebug Design Washi Challenge.  Check out the other fun stuff they have going on at Scrapbook.com today (including 10% off and a free stamp set with purchase).

Materials:

  • Pink card stock
  • White card stock
  • Doodlebug Design: Under the Sea patterned paper
  • Doodlebug Design: Candy Stripes washi tape
  • Taylored Expressions: Up, Up and Away cutting plate
  • Mama Elephant: Playful Pups stamps and dies
  • Lawn Fawn: Scalloped Rectangle Stackables
  • Copic Markers
  • Memento Tuxedo Black Ink
  • Foam Adhesive
  • Adhesive Tape Runner

Directions via YouTube:

  • You can watch me make this card on my YouTube channel (click here).  I am trying to post more card making process videos, so please subscribe to my channel if you want to see more projects!


Directions:
  • To make your card base, start with a piece of 4.25"W x 11"H pink card stock and fold at the 5.5" mark.
  • Die cut the inside of the card using the scalloped rectangle die and stamp "Yappy Birthday" inside.
  • Stamp the puppy with Memento Tuxedo Black Ink on scrap card stock and color with Copic markers. Die cut the puppy using the coordinating dies.
  • Layer pieces of washi tape on white card stock to form a diagonal striped pattern.  I used pink, orange, green, blue and purple tape for this. Use the Taylored Expressions dies to cut out the balloons.
  • Die cut the full cutting plate from both the patterned paper and white card stock.
  • Layer everything together and use foam adhesive to pop the pink balloon and frame from the card base.  Attach the puppy to the lower corner using foam adhesive.  
Here's a close-up of the card:


Happy Birthday, Chu!


Sunday, June 21, 2015

Happy Father's Day, Ba!

Hi everyone,

Today is Father's Day in the United States and it's also the first day of summer.  I decided to make a card that reminded me of my childhood swing set in our old house in Connecticut.  I also tried to incorporate products from all my favorite manufacturers.  Wasn't able to get everyone in, but I used as many different products as possible.


I grew up in New England.  Born in Connecticut, raised in Massachusetts.  In our old house in Connecticut, we had a swing set in our yard.  We also had a pretty hilly front yard and a big forest in our backyard.  As a little kid, I remember playing on the swing set.  I don't remember exactly what it looked like, but I remember it had red and blue stripes.  I was also a crabby little kid with a very short temper, but my dad (I call him Ba - short for Baba which means "father" in Chinese) is one of most patient people I know.  He was able to put up with my random whims.  For example, I wanted a swing set both inside and outside of the house.  So my father removed one of our swings from the set and attached it to our basement ceiling... so I could swing indoors too.  That's kind of random, right?

Vintage family photo - I'm the little girl...
Materials:

  • White card base: 4.25"W x 11"H, scored at 5.5" mark
  • Blue card stock for sky background: 4"W x 5.25"H
  • Doodlebug Designs Patterned Paper fro the grass and clouds
  • Swing Set: Lawn Fawn Let's Play Stamp Set
  • Crab: Lawn Fawn Life is Good Stamp Set
  • 'Happy' sentiment: Simon Says Stamp Happy & Smile Stamp Set
  • 'Father's Day' sentiment: Mama Elephant Happy Everything Stamp Set
  • Clouds: Taylored Expressions Build a Scene Clouds Dies
  • Sunshine: Sizzix/Stephanie Barnard Hello Sunshine Dies
  • Hills: Simon Says Stamp Stitched Slopes and Hills
  • Versamark Ink Pad
  • Memento Tuxedo Black Ink Pad
  • Ranger White Embossing Powder
  • Copic Markers
    • Red: R22, R24, R29
    • Blue: B12, B14, B16
    • Grey: N0, N2, N4

Directions:

  • Die cut the hills from the green grass paper
  • Die cut the clouds from the white polka dot paper
  • Die cut the sunshine from yellow and orange yardstick
  • Stamp the swing set and crab using Memento Tuxedo Black Ink and color with Copic Markers
  • Use the coordinating stamps to cut out the swing set.
  • Fussy cut the crab
  • Stamp "Happy Father's Day" on the green hill using Versamark Ink and heat emboss with White Embossing powder.
  • Assemble the card according to the photo.  I used foam adhesive for the Sunshine and the front hill to create more dimension.
Happy Father's Day to all the fathers out there, especially my very own Baba!

Tuesday, March 10, 2015

"New" Product Tuesday: Taylored Expressions Balloons and Rainbow Brights

Hello everyone!

Welcome to my new weekly blog series: "New Product Tuesday."  Tuesdays are special in the Entertainment industry.  New albums and DVDs are released every Tuesday.  Back in the day, people used to line up and get excited about the new releases.  I'm sure some people still get as excited these days, but in the digital world... we are so used to having things at our finger tips that the idea of "waiting" for something seems to be a thing of the distant past.

In honor of "New Product Tuesdays" - I've decided to start a weekly blog series featuring a new craft product.  However, I must clarify my definition of "NEW" when referring to a new craft product in this weekly series.  These products are NEW to ME.  They may fall into a few categories:

  • New Product Releases: new products that just entered the market within the last month or two.
  • Products I've purchased but haven't opened: you know the feeling when you have one of those 40% or 50% off coupons at Michael's or you see something on clearance and you just want to try it out?  Well, here's where I'll try it out. It'll also force me to use the products in a creative way.
  • Products I've inherited or received as gifts: occasionally friends will give me products to try... perhaps they're gently used or perhaps they've never been opened but were sitting in the closet collecting dust.  They're still new to me!
  • Product I've rediscovered (i.e. stashed away in my storage closets or boxes): this just happened to me last week.  I found an unopened box of colored pencils that are probably 20 years old.  I've had a blast using them to make cards this week.  So fun! 
Anyhow, enough of an introduction.  This week's post features some fun products from Taylored Expressions: the Up Up and Away Cutting Plate and Rainbow Brights Paper and Sequins.  Here are the cards:

Balloon shaker card

Balloon Distress Ink Card

These products haven't been out too long -- the Up, Up and Away cutting plate was released in September 2014 and the Rainbow Brights paper and sequins were released in January 2015.  


The cutting plate is so cool.  It also comes with two separate balloon dies (a round one and an oblong one) which you can layer on top of the cutting plate, or you can die cut you own designs.  I also love the paper and sequins!  These remind me of my rainbow loving days of yesteryear -- wait, who am I kidding?  I still like rainbow colors today!  My old sticker album from 3rd grade featured pages and pages of rainbow stickers... some things just don't change!

Directions on how I made the cards are listed below.  Enjoy!

Balloon Shaker Card:
  • Materials:
  • Directions:
    • Use the largest stitched rectangle die and cut the card front
    • Use the stand alone balloon dies to cut three balloons on the white card
    • Using the pink pen, draw balloon strings down towards the bottom of the card
    • On the back of the white card:
      • Cover the balloon windows with acetate.
      • Use foam adhesive and section off the areas for each balloon
      • Carefully fill each well with Rainbow Brights sequins.  I paired two colors for each balloon (pink+purple, yellow+green, blue+white)
      • Add foam adhesive to the rest of the back of the card.
      • Cover the back with the striped rainbow patterned paper.  Make sure the patterned side shows through the windows.
    • Stamp the "Happy Birthday" greeting on a piece of white card stock.  Cut this down to a strip approximately 3.5"W x 1"H.  Cut a fish tail on the left side.
    • Cut a piece of rainbow striped paper slightly larger than the sentiment banner to add a decorative border.
    • Adhere the sentiment to the front of the card and curl the ends up by rolling the ends around a pen or pencil.
    • Place the card on the pink card base and you're done!  Shake it up, up and away!
Balloon Distress Ink Card:
  • Materials:
    • White cardstock: 4.25"W x 11"H, scored at 5.5" mark
    • White card stock: 4"W x 5.25"H
    • Taylored Expressions:
      •  Up, Up and Away Cutting Plate
      • Happy Birthday Stamp
    • Distress Inks
      • Three shades each of red, blue, yellow and green
    • Adhesive tape runner
    • Versamark Ink Pad
    • Ranger Liquid Platinum Embossing Powder
  • Directions
    • Use the stand alone balloon dies to cut two oblong balloons and two round balloons
    • Use the Up, Up and Away Cutting Plate to cut the front panel of the card
    • Use Versamark Ink and the embossing powder to cover the balloon strings on the front panel.  It's okay if you cover some of the balloons, because we will cover them with the colorful balloons
    • Stamp the Happy Birthday sentiment in the lower right corner with Versamark and emboss this as well.
    • Use Distress Ink and shade the balloon die cuts.  Here are the colors I used for each set of balloons:
                      
                                  
                  • Adhere the balloons to the front of the card.  You're done!
                Hope you enjoy these cards!

                Tuesday, December 16, 2014

                Countdown to Xmas: 25 Cards, 25 Days - Day 16

                Greetings!

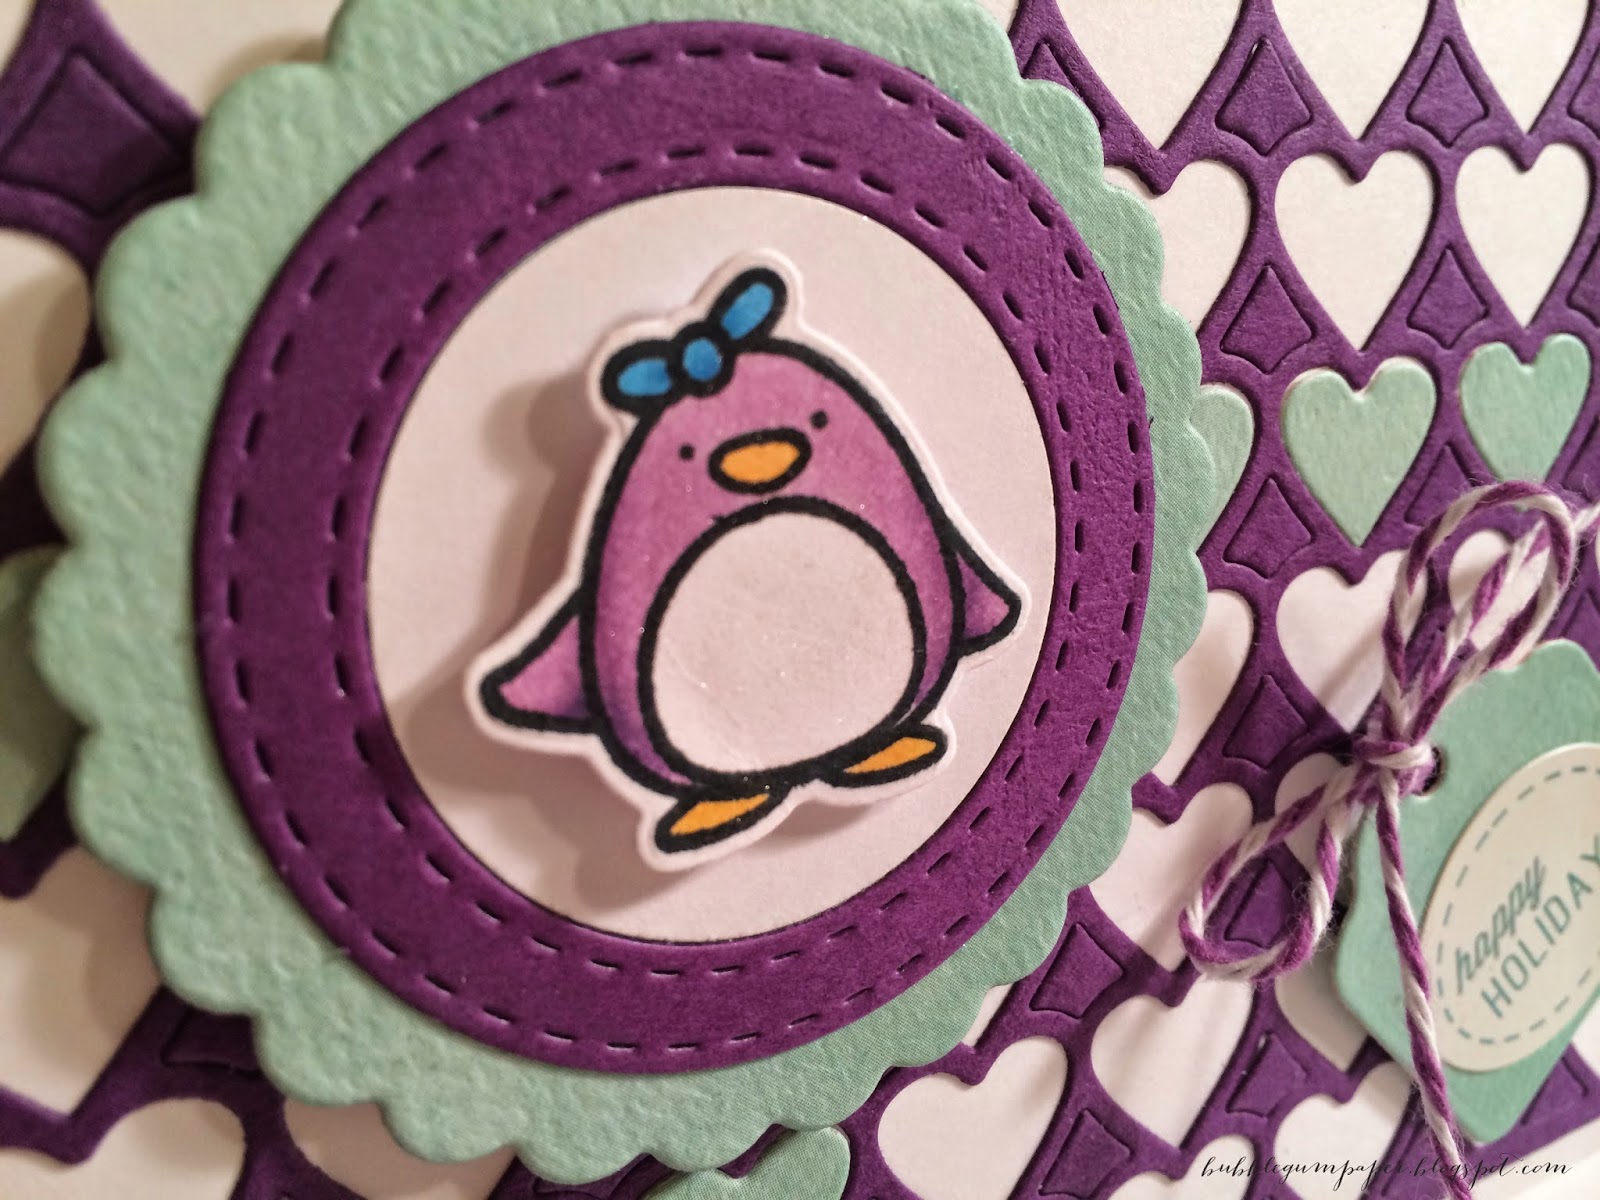
                I decided to stray from the traditional red/green color combination and made a purple/aqua card.  It's a generic "happy holidays" card using the Taylored Expressions hearts cutting plate along with some product you've seen in previous cards.  The cute Polar Pals Penguin from Mama Elephant makes her appearance again in today's card.


                Materials:

                 Directions:

                • Stamp the Penguin on white card stock with Memento Tuxedo Black ink and color with Copic markers
                • Cut a scalloped circle from the Aqua Paper, Stitched Circle from the purple paper and plain circle from the white card stock.  Glue all three layers together and put the penguin on top with foam adhesive.
                • Adhere one Sizzix Adhesive Sheet to the back of the purple card stock (at least 4.25" x 5.5").  Also add some waxed paper between the heart cutting plate and the card stock.  This will prevent the paper from getting stuck in the cutting plate.
                • Repeat the previous step with Aqua paper.  You only need to die-cut half the heart cutting plate since you only need 14 aqua hearts.
                • Place the purple heart pattern on the white card base, remove the hearts, but keep the little pieces between the hearts in place.  Create a "ribbon" - vertical and horizontal lines using the aqua hearts.  
                • Adhere the Penguin piece over the intersection of the aqua hearts.
                • Die cut the tag and add the twine and sticker.  Adhere to lower right corner with a foam dot.
                • Here's a close-up of all the die-cutting for this card:


                Enjoy!